• After 15+ years, we've made a big change: Android Forums is now Early Bird Club. Learn more here.

Unknown red dot in Chrome browser

Hi
Thank you for letting me join.
Today I noticed a red dot with an A in it every time I start to search on Chrome. I worked out it was either Argos or Amazon, but I want to get rid of it. I check apps , notifications etc but cannot find a way to get rid of it.
I also cleared my history and cache.
It's still there. Does anyone have a solution to this.
TIA
Sharon

Attachments

  • Screenshot_2020-09-27-22-22-36-933.jpeg
    Screenshot_2020-09-27-22-22-36-933.jpeg
    8.1 KB · Views: 372

[GUIDE] Disabling Intel ME - Dell Precision M4800

DISABLING INTEL ME - DELL PRECISION M4800

I've been gifted a chip flasher and have been using it for the power of good: to disable the Intel Management Engine on all the laptops I can. I've done it on a few so far, and maybe in the future I'll put up guides for all of those other ones I did too, but for now I want to write how to do it on the Dell Precision M4800 because I just did that one earlier tonight.

Like with Android mods, by following this guide you acknowledge you're doing this at your own risk. BIOS mods are very risky, messing up one thing could literally brick your entire computer and make it unusable. This guide assumes you're somewhat computer-literate, and (ideally) have used a chip flasher before.


WHAT IS INTEL ME, AND WHY IS IT AN ISSUE

Intel's Management Engine is basically a computer inside of your computer. You cannot access this secondary-computer from your "normal-computer", but it CAN access your normal-computer. In fact, that's exactly what it was designed to be: an invisible man in the middle for everything that goes on on your system. Intel ME can log keystrokes, access files, circumvent OS firewalls, read encryption keys in memory... it can basically see and manipulate everything about your computer. It's an invisible administrator you have no control over, and comes standard on every Intel machine from ~2007 onwards. Doesn't matter what OS you're running, if you have an Intel computer, Intel ME can access everything about your machine.

The problem with Intel ME is that it can be, and has been, exploited. If an attacker can gain access to Intel ME on your computer, they have complete low-level access to anything and everything that goes on on your machine, regardless of what OS you're running. And if your machine's ME has been exploited, there's no way for you to know, nor is there a way for you to remove it. You're pretty much screwed, and you'll never even realize it.

WHY YOU SHOULD DISABLE INTEL ME

For most machines, it's impossible to entirely remove Intel ME or else you'll brick your computer*. You can however, "disable" it if you're willing to gain physical access to the BIOS chip on your system's motherboard and do some external reading and flashing. When you disable Intel ME, it only does the critical functions necessary to start your computer up during the BIOS. After the BIOS is done and your OS loads, ME shuts itself off and renders itself unavailable for the rest of the time the computer is on. Unfortunately it still needs to remain on your system, but having it disable itself after the BIOS is much better than having it run all the time.

*....unless your computer is running a pre-Nehalem series CPU like a Core 2 Duo, then according to the me_cleaner Github page it IS possible to remove it entirely and the script can do that for you. The Dell Precision M4800 does not fall in this category though.

SIDE EFFECTS OF DISABLING INTEL ME

  • On some machines, Intel P States will no longer work. Intel P States is a power saving feature. I'm not sure exactly how it all works, but it has something to do with lowering power consumption when the computer is idle or suspended. This is mostly used for laptops as you can imagine. If you want to read more about it, go HERE. There is no way to tell if a particular machine will break P States when disabling Intel ME. One machine may break it, another may continue to have it work just fine. These machines may be identical laptops too: as in one Precision M4800 may break it while another identical one won't.
  • When you go back into your BIOS, it will say all the DIMM (RAM) slots are empty. Your RAM and RAM slots still work fine. For some reason the BIOS just doesn't display them anymore. This is normal.

There are no other known side effects for disabling Intel ME, assuming it is disabled properly. I did it on my machine here and everything's working just fine. I'm not sure if my P States are broken, but even if they are I'm not too concerned with potential power drainage because the battery life on this thing is so terrible to begin with.

WHAT YOU'LL NEED

  • A Dell Precision M4800 to clean
  • Another computer with Linux to do the actual BIOS reading/writing/modding with (in this guide I assume you're running Ubuntu/Mint, but pretty much any distro should be fine)
  • An SPI flasher, I used the CH341A flasher over USB (you can use other things like a Raspberry Pi if you want but for this guide I'm assuming this kind of flasher)
  • An 8-pin chip clip to attach to the flasher
PREREQUISITE: INSTALLING NEEDED PACKAGES

On your secondary Linux computer use a sudo apt install command to install git and flashrom. Then use git to clone the me_cleaner scripts to your home directory with "git clone https://github.com/corna/me_cleaner.git". You'll also need python3 to run the me_cleaner py script, but most Linux distros should come with this already.

PREREQUISITE: UPDATE THE PRECISION'S BIOS

I'm not sure if doing an ME clean is a 100% persistent mod that will stick through BIOS updates, especially if said update alters the 8M chip that ME is located on. So I recommend updating the BIOS on the Precision beforehand to get the latest patches and microcode before continuing and doing the mod. That way, you'll have recent security patches on your machine's firmware in case you don't want to update the BIOS again and run the risk of the mod erasing itself.

As of writing this post, the latest BIOS can be found HERE. I highly recommend checking the Precision M4800 driver page for a later revision though. Install whatever the latest revision is. Set your OS to be "BIOS" to see this. This BIOS update EXE can either be flashed in Windows, or if you're running Linux on your M4800, make a FreeDOS USB with Unetbootin and put the BIOS update EXE on there. Then boot from the FreeDOS USB in legacy boot mode, run the BIOS update from that, and let it complete as normal.

PREREQUISITE: SETTING UP THE FLASHER

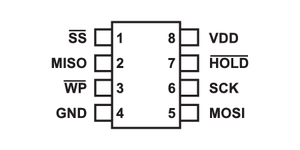
To be honest my buddy did this part here, so I have no idea what any of this means, but you'll need to have your 8 Pin Layout on the flasher to be like the following. Once I learn more about this I'll update the section with better info.

8-pin-layout.png

If you can, make Pin 1 a different color too. For ours we have that wire as red and the others are grey.

Make sure your flasher is set up for 3.3V too. Any more could damage the components.

STEP 1: DISASSEMBLING THE M4800 AND LOCATING THE BIOS CHIPS

The Dell Precision M4800 has 2 BIOS chips, the usual 4MB and 8MB setup found on many laptops. Complete mainboard disassembly/removal is required to access the BIOS chips. Full guides can be found on Dell's Precision M4800 User Guide on their website. Unfortunately I did not get a picture of the BIOS chips but here is a reference image of the topside of the mainboard. The BIOS chips are found under the black cover. Relative to the following image of the mainboard, they are to the right of the docking port and below the CMOS battery. They are 2 Winbond chips lined up left and right.

https://www.vrassets.us/images/product/_57_16_4274.jpg

The leftmost one (closest to the CPU bracket) is the 4M chip, the other to the right the 8M chip. The Winbond BIOS chips on this machine will look similar to this (the model number will probably be different but basically just look for 2 of these right next to each other):

https://c.76.my/Malaysia/bios-chip-...m-empty-hypertronic-1612-20-hypertronic@1.jpg

To disable ME, you SHOULD only need a read of the 8M chip, the one furthest from the CPU bracket closer to the edge of the mainboard. But we will be pulling both images nonetheless just for the sake of ensuring we do a complete job. Never hurts to have a backup of both chips anyway.

STEP 2: READING THE FIRST BIOS CHIP

Like stated before, although only the 8M chip should required, I recommend getting a read from both since you're already there anyway.

A quick note too, make sure the flasher is unplugged when messing with the chip clip. This will reduce the risk of a short circuit or something screwing the BIOS chips up. When you're done aligning the clip and you let it go, THEN you can plug in the flasher and run the flashrom commands.

On the first Winbond chip (we will start with the one closest to the CPU bracket, the one closest to the mainboard center), align the 8 pin clip so that Pin 1 aligns with the dot on the BIOS chip. If you made the Pin 1 wire a different color, this part will be easy. Clamp the clip to the BIOS chip and then plug the flasher into your secondary computer. Make sure that all the chip clip's contacts are making good contact with the 8 silver contacts running out of the BIOS chip. Run the following command to read the 4M BIOS chip contents:

sudo flashrom -p ch341a_spi -r close-to-center.rom

If flashrom complains that no chip was found, unplug the flasher from its USB port and try to unclamp and clamp the 8 pin clip again. Sometimes the clamp isn't good and all the clip's contacts aren't really all making good contact with the BIOS chip. I'm not really good at this part myself, I had to retry the clamp 2 or 3 times before it finally worked. If all goes well though, after a minute or two you'll have a close-to-center.rom on your secondary computer that should be 4MB in size.

Once it's read successfully, get another read in a separate file without unplugging it:

sudo flashrom -p ch341a_spi -r close-to-center-1.rom

You want 2 reads because you want to make sure the computer actually read the BIOS chip's contents properly. If you MD5 each ROM you pulled and they're the same, then it was probably a good read. If they're different, unclip and try again until you get consistent reads. To run MD5 hashes on each image, do the following commands:

md5sum close-to-center.rom
md5sum close-to-center-1.rom

If the output is the same, you're good to go.

STEP 3: READING THE SECOND BIOS CHIP

Unplug the flasher and move the clip over to the other Winbound BIOS chip that's further from the center. Do the same thing as outlined above, but change the file names:

sudo flashrom -p ch341a_spi -r far-from-center.rom
sudo flashrom -p ch341a_spi -r far-from-center-1.rom

Assuming all was good and the MD5 sums were identical, now you should have good reads of both BIOS chips: one ROM being 4MB and the other ROM being 8MB.

By the way, once your confirm that both reads were good/identical, you can delete the files with the -1 suffix. All you need are one copy of each, those extra copies were just to ensure that the reads of each chip you got were good.

STEP 4: RUNNING ME CLEANER

cd to the me_cleaner git repo you cloned and run the me_cleaner.py script on both BIOS images:

python3 me_cleaner.py -S -O ~/close-to-center-CLEANED.rom ~/close-to-center.rom
python3 me_cleaner.py -S -O ~/far-from-center-CLEANED.rom ~/far-from-center.rom

It should fail on the 4M (close to center) image, this is fine. Running the cleaner script on both anyway is just to make sure you're getting everything you can. You should now have another 8MB ROM image in your home directory with a CLEANED suffix at the end.

STEP 5: FLASHING BACK THE CLEANED IMAGE

As stated before, me_cleaner should have only recognized and cleaned the 8M image, or the image of the BIOS chip furthest from the center. You now want to write this cleaned image back to the Precision M4800. Make sure your clip is clamped onto the correct BIOS chip, and write it back with the following command:

sudo flashrom -p ch341a_spi -w far-from-center-CLEANED.rom

After a few minutes, if all went well it will have successfully written and verified the cleaned image back to the M4800. Unplug the reader from the USB, then unclamp the clip from the BIOS chip. It's now time to reassemble everything and see if it worked.

STEP 6: REASSEMBLY AND TESTING

Reassemble the M4800 and boot into it. Once reassembled you might notice that the Precision shuts itself off and power cycles a lot once you first turn it on. You might also notice that once you first turn it on again after reassembling the BIOS menu is broken and doesn't let you alter any settings. THIS IS NORMAL, THIS HAPPENED TO ME TOO. Just let the machine boot from your OS on the internal HDD and reboot it. I dont know why the laptop gets all tempermental like that but just leave it do its thing for 2-3 minutes and after it gets over its state of panic and dimentia it should go back to normal. From this point on you should be able to alter the BIOS settings again (which you should do because having the CMOS out for so long reset any changes you made before) and it won't take 3 minutes and 5 power cycles to turn on again. All Dell laptops I own do this, this is all normal behavior.

Once you let it do its initial boot and sort itself out, then you need to boot into Linux on it somehow. Like with the secondary computer, I will be assuming Ubuntu or Mint. If you had Linux installed on an internal drive just do that. if not, make a live USB and boot from that. Whatever you choose to do, you want to make sure you have the iomem kernel parameter set as relaxed. Regardless if you're running Linux off of a Live USB or internally, get to a GRUB boot menu and press E to edit the boot option that starts the OS normally. Look for the line that ends with a "--". Right before this --, add "iomem=relaxed" without quotes, and with a space before and after it. Then press Ctrl+X or whatever key it tells you to boot.

Once in Linux, run the following commands to get the required stuff for testing and to test for Intel ME:

sudo apt update
sudo apt install libpci-dev git make build-essential
git clone https://review.coreboot.org/coreboot.git
cd coreboot/util/intelmetool/
make
sudo modprobe msr
sudo ./intelmetool -b

If all went well, you will see the tool report that ME failed to become ready. The ME status table will look something like this:

ME: FW Partition Table : OK
ME: Bringup Loader Failure : NO
ME: Firmware Init Complete : NO
ME: Manufacturing Mode : YES
ME: Boot Options Present : NO
ME: Update In Progress : NO
ME: Current Working State : Initializing
ME: Current Operation State : Bring up
ME: Current Operation Mode : Debug
ME: Error Code : No Error
ME: Progress Phase : BUP Phase
ME: Power Management Event : Pseudo-global reset
ME: Progress Phase State : 0x4d


...In addition to this, if you also see the following at the end:

Your southbridge configuration is insecure!!
BootGuard keys can be overwritten or wiped, or you are in developer mode.
BootGuard MSR Output : 0x0
Your system isn't BootGuard ready.
You can flash other firmware!


Your system can have open source firmware like coreboot ported to it in the future. This is unrelated to the guide, but worth mentioning nonetheless because coreboot would be awesome on this thing.

You can now use your computer like normal, with the peace of mind that Intel's Management Engine backdoor has been defeated on your system.

CONCLUSION

I wrote this pretty late at night so if I failed to describe some things properly I apologize in advance. Let me know in a reply and I'll try to fix it when I can. I'm 99% sure all my info is correct, but if I made a stupid mistake, like for example after reading both BIOS images you found out I mixed up the sizes for each chip, please let me know and I'll fix it. That being said, I am confident I got it all right though.

FOLLOW UP (UNTESTED): A MORE PERMANENT INTEL ME REMOVAL

According to the man pages for me_cleaner, there is a way to disable Intel ME AND disable read/write access to the ME region so that supposedly updating the BIOS doesn't change the fact that it's disabled and overwrite your mod. I haven't done this myself so I can't testify if it works or not, but I'll put a copy+paste from the man pages on corna's me_cleaner GitHub page here in case any of you want to try it:

"Remove most of the Intel ME firmware modules and set the HAP/AltMeDisable bit, disable the Read/Write access of Intel ME to the other flash region, then relocate the code to the top of the image and truncate it, extracting a modified descriptor and ME image:

me_cleaner.py -S -r -t -d -D ifd_shrinked.bin -M me_shrinked.bin -O modified_firmware.bin full_dumped_firmware.bin"

This does more than a soft disable like I did in my guide, this apparently also deletes the unused parts of the ME region, disables the ability for the rest of the BIOS to modify it, and relocates the shrunken image to the beginning of its allocated BIOS memory space. While my outlined solution was more of a soft-disable, this right here is an example of a much more permanent hard-disable. I didn't know you could do this, and have never done this myself. Therefore I cannot vouch that this will work on this specific computer, but I want to list it here anyway for the following reason:

In theory this can only be done on a computer whose BIOS regions are not protected and verified. On most newer computers (Intel Haswell generation or newer) you probably won't be able to do this because of Intel Boot Guard and Verified Boot. But would you look at that... despite being a Haswell laptop the Precision M4800 doesn't have Boot Guard or Verified Boot as outlined before, so this COULD work on this machine because there's no signature verification on a firmware level.

I can't find where the 2 step verification codes are for Androidforums

Hi,

I just recently changed my password on this site, but when trying to login it is promoting me to enter a 2 step verification code.
I installed the forums app assuming that I could generate it from there, but I can't.
Does anyone know how to add this verification to the Google authenticator app?

I didn't get asked for verification codes when using the app on my phone, just on the website.

Samsung Galaxy Note 9 — ADDING NEW RINGTONE TO S6

Hello:
I'm trying to add a new sonnerie from an MP3 file. I go to Settings/Ringtone and scroll down to "add from device storage" when I click on this I get a window what shows my gmail address as well as my yahoo address. I click on this and then it goes to "My drive choose an item" then I clock and it shows, my drive, computers, shared with me, starred, and recent. No matter which I choose I can't find the file that i'm looking for, it's in my download folder. But it won't let me find it by doing what I mentioned above

Hope you all can help.
thanks
Hope you can

App Inventor How to pass the Selected Image To ImageView From ArrayList

CardView Been clicked and gallery opened, Selected an Image, I'm trying to pass the image selected from the gallery and pass to ImagePreview inside the CardView , the cardview is generated via ArrayList. I'm getting the error like delivering a result

java.lang.RuntimeException: Failure delivering result ResultInfo{who=null, request=123, result=-1, data=Intent


rh55Zhp.png

Shortcut Question

Hello. Can a shortcut be created in Android for single actions, such as turning the Hotspot on?

Yes, I have a crappy phone. I wanted to sign up for Visible and my Samsung S6 was not compatible with their system, so I traded it in for the free ZTE A3 Prime. I rarely use a phone since I retired. It's running Android Ver 10.

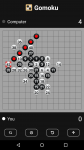
Gomoku game

Hello Everyone,

I am learning programming and made my first android game.

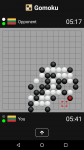
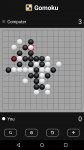
It is a classic abstract board game called Gomoku.

The AI looks quite good to me - wins more than I do.

It was very fun to make this project alive.

I am planning to improve it more.

Anyway, thank you for reading, Good Luck Everyone!

gomoku_game_1.png gomoku_game_2.png gomoku_game_3.png

Copy images from gallery in app directory targetSDKVersion > 28

Hallo, sorry for my bad english.

I have problems with the value "targetSdkVersion" in the build.gradle related to copying images from the Gallery to my APP directory. The background is that I use MediaStore.INTENT_ACTION_STILL_IMAGE_CAMERA take several pictures in a row with the camera APP and then display them in a list. Unlike with MediaStore.ACTION_IMAGE_CAPTURE you can't save the pictures directly here and with the second you can only take a picture.

If set the value 28 as targetSdkVersion, I can easily copy images from the Gallery to my APP directory (after appropriate permission) and no more at 29 (otherwise no change). srcFile.exist() returns true at both values, FileTools.fileCopy(src,dest) returns true at value 28 and the file is copied. If 29 is a value, the value is returned false and the file is not copied. The app needs to be uninstalled and reinstalled once when changing values, there are no problems with the update from 28 to 29.
I think this has something to do with it, as can be seen from https://developer.android.com/distribute/best-practices/develop/target-sdk.
• Scoped storage
• External storage access is limited only to an app-specific directory and to specific types of media that the app has created.

Does anyone have an idea what alternative I have to copy the images from the DCIM directory to my app directory. Other apps do the same.

greetings Jens

Update notification

Hello, I am still learning the way Android does things and unlearning the iOS way with my brand Pixel 4a and my first Android smartphone.

It is only by pure chance that while browsing the different settings, I got to > System > Advanced and there at the very bottom of the Advanced screen, it surprised me to see the last item is System Update > System Update available (Android 11)

Before getting deep down into the settings, I did not see any sign that a system update was available. Nothing visible on the System icon on my home screen to make me aware that something new is available for the system.

Did I miss something? I am still on Android 10 and before I update to 11, can somebody tell me where is and how looks the hint on the Home Screen about an available update, so when a future update is available, I will be better aware.

Thank you very much.

netstat connections.

Hi I'm trying to learn more about Android OS and how it utilizes connections. I'm using a Samsung Galaxy Note 9 512GB with Android 10. I'm using the app "termux" to use shell commands, not adb. When I run:

$ netstat -a

It returns:

Active Internet connections (servers and established)
Proto Recv-Q Send-Q Local Address Foreign Address State
Active UNIX domain sockets (servers and established)
Proto RefCnt Flags Type State I-Node Path
unix 2 [ ACC ] STREAM LISTENING 31747 /dev/socket/zygote
unix 2 [ ACC ] STREAM LISTENING 33312 @mcdaemon
unix 2 [ ACC ] STREAM LISTENING 31752 /dev/socket/usap_pool_primary
unix 2 [ ACC ] SEQPACKET LISTENING 16135 /dev/socket/lmkd
unix 2 [ ACC ] STREAM LISTENING 34219 /data/.socket_stream
unix 2 [ ] STREAM 33803 /dev/socket/sap_uim_socket1
unix 2 [ ACC ] STREAM LISTENING 37863 /data/.tcpdump_socket
unix 2 [ ACC ] STREAM LISTENING 7699 /dev/socket/traced_consumer
unix 2 [ ACC ] STREAM LISTENING 7704 /dev/socket/traced_producer
unix 2 [ ACC ] SEQPACKET LISTENING 34064 /dev/socket/tombstoned_crash
unix 2 [ ACC ] SEQPACKET LISTENING 34081 /dev/socket/tombstoned_intercept
unix 2 [ ] DGRAM 24353 /dev/socket/wpa_wlan0
unix 2 [ ACC ] STREAM LISTENING 44384 /data/system/ndebugsocket
unix 2 [ ACC ] SEQPACKET LISTENING 34084 /dev/socket/tombstoned_java_trace
unix 2 [ ACC ] STREAM LISTENING 3036 @com.android.internal.os.WebViewZygoteInit/8008e13c-f194-4023-98cf-138090c059a4
unix 2 [ ] DGRAM 34349 /dev/socket/location/xtra/socket_xtra
unix 2 [ ACC ] STREAM LISTENING 36028 @EngineeringModeServiceSocket
unix 2 [ ACC ] STREAM LISTENING 36670 /dev/socket/eris
unix 2 [ ACC ] STREAM LISTENING 30280 /dev/socket/dnsproxyd
unix 2 [ ACC ] STREAM LISTENING 39209 @Multiclient
unix 2 [ ACC ] STREAM LISTENING 30287 /dev/socket/napproxyd
unix 2 [ ACC ] STREAM LISTENING 30290 /dev/socket/domainfproxyd
unix 2 [ ACC ] STREAM LISTENING 30293 /dev/socket/mdns
unix 2 [ ACC ] STREAM LISTENING 30296 /dev/socket/fwmarkd
unix 2 [ ACC ] STREAM LISTENING 25176 /dev/socket/frigate
unix 2 [ ACC ] STREAM LISTENING 30299 /dev/socket/tcpopd
unix 2 [ ACC ] STREAM LISTENING 30302 /dev/socket/qosd
unix 2 [ ACC ] STREAM LISTENING 30305 /dev/socket/SecSoftap
unix 2 [ ACC ] STREAM LISTENING 28003 /dev/socket/vaultkeeper/vaultkeeper
unix 2 [ ] STREAM 25956 /dev/socket/pps
unix 2 [ ACC ] STREAM LISTENING 31081 /dev/socket/location/mq/location-mq-s
unix 2 [ ACC ] STREAM LISTENING 33841 @time_genoff
unix 2 [ ACC ] SEQPACKET LISTENING 32404 /dev/socket/mlaudio/audio_server
unix 2 [ ACC ] STREAM LISTENING 15508 /dev/socket/logd
unix 2 [ ACC ] SEQPACKET LISTENING 32407 /dev/socket/mlaudio/audio_client
unix 2 [ ACC ] SEQPACKET LISTENING 15513 /dev/socket/logdr
unix 238 [ ] DGRAM 15516 /dev/socket/logdw
unix 2 [ ] DGRAM 48376 /data/vendor/wifi/wpa/sockets/wlan0
unix 14 [ ] DGRAM 30369 /dev/socket/statsdw
unix 2 [ ACC ] STREAM LISTENING 36037 @PACMSERVICE
unix 2 [ ACC ] STREAM LISTENING 2845 @THERMALE_UI
unix 2 [ ] DGRAM 17840 /dev/socket/ipacm_log_file
unix 2 [ ACC ] STREAM LISTENING 25010 /dev/socket/property_service
unix 2 [ ACC ] STREAM LISTENING 129975 /dev/socket/mdnsd
unix 2 [ ACC ] STREAM LISTENING 32658 @perfmon_send
unix 2 [ ACC ] STREAM LISTENING 16325 /dev/socket/stork/stork
unix 2 [ ACC ] STREAM LISTENING 30918 /dev/socket/sdp
unix 2 [ ACC ] STREAM LISTENING 2510 /dev/socket/ss_conn_daemon2
unix 2 [ ACC ] STREAM LISTENING 24015 /dev/socket/imsd
unix 2 [ ACC ] STREAM LISTENING 37946 @VND_Multiclient
unix 2 [ ACC ] STREAM LISTENING 2520 /dev/socket/thermal-send-client
unix 2 [ ACC ] STREAM LISTENING 2525 /dev/socket/thermal-recv-client
unix 2 [ ACC ] STREAM LISTENING 2528 /dev/socket/thermal-recv-passive-client
unix 2 [ ACC ] STREAM LISTENING 2531 /dev/socket/thermal-send-rule
unix 2 [ ACC ] STREAM LISTENING 7650 /dev/socket/bsd/bsd
unix 2 [ ] DGRAM 27625 /dev/socket/location/socket_hal
unix 2 [ ACC ] STREAM LISTENING 2539 /dev/socket/zygote_secondary
unix 2 [ ACC ] STREAM LISTENING 2544 /dev/socket/usap_pool_secondary
unix 2 [ ] DGRAM 25391 @gplisnr@
unix 2 [ ACC ] SEQPACKET LISTENING 54769 /dev/socket/perfsdkserver
unix 2 [ ACC ] STREAM LISTENING 35779 @DeviceRootKeyService
unix 2 [ ] DGRAM 209621
unix 2 [ ] DGRAM 36120
unix 3 [ ] SEQPACKET CONNECTED 33702
unix 3 [ ] SEQPACKET CONNECTED 2906
unix 2 [ ] DGRAM 25182
unix 3 [ ] STREAM CONNECTED 227583
unix 2 [ ] DGRAM 216184
unix 3 [ ] SEQPACKET CONNECTED 113351
unix 2 [ ] DGRAM 112054
unix 2 [ ] DGRAM 32393
unix 2 [ ] DGRAM 36708
unix 2 [ ] DGRAM 18373
unix 2 [ ] DGRAM 216080
unix 2 [ ] DGRAM 99167
unix 2 [ ] DGRAM 59253
unix 2 [ ] DGRAM 197980
unix 3 [ ] SEQPACKET CONNECTED 84092
unix 2 [ ] DGRAM 60195
unix 2 [ ] DGRAM 52509
unix 3 [ ] SEQPACKET CONNECTED 2905
unix 2 [ ] DGRAM 222429
unix 2 [ ] DGRAM 54689
unix 2 [ ] DGRAM 50561
unix 3 [ ] SEQPACKET CONNECTED 46207
unix 2 [ ] DGRAM 33865
unix 3 [ ] STREAM CONNECTED 226458 /dev/socket/qosd
unix 3 [ ] STREAM CONNECTED 42936 /dev/socket/sdp
unix 2 [ ] DGRAM 200982
unix 2 [ ] DGRAM 137071
unix 3 [ ] STREAM CONNECTED 70037
unix 3 [ ] STREAM CONNECTED 67449
unix 3 [ ] SEQPACKET CONNECTED 227566
unix 2 [ ] DGRAM 103598
unix 3 [ ] SEQPACKET CONNECTED 95695
unix 3 [ ] STREAM CONNECTED 60737
unix 2 [ ] DGRAM 32344
unix 3 [ ] SEQPACKET CONNECTED 28109
unix 2 [ ] DGRAM 68739
unix 3 [ ] SEQPACKET CONNECTED 60046
unix 3 [ ] SEQPACKET CONNECTED 46205
unix 2 [ ] DGRAM 1791
unix 3 [ ] STREAM CONNECTED 107801
unix 3 [ ] SEQPACKET CONNECTED 227560
unix 2 [ ] DGRAM 179957
unix 2 [ ] DGRAM 102726
unix 3 [ ] SEQPACKET CONNECTED 54020
unix 3 [ ] SEQPACKET CONNECTED 46206
unix 2 [ ] DGRAM 18375
unix 3 [ ] STREAM CONNECTED 42943 /dev/socket/mdns
unix 2 [ ] DGRAM 16054
unix 2 [ ] DGRAM 17947
unix 3 [ ] SEQPACKET CONNECTED 93171
unix 3 [ ] STREAM CONNECTED 60736
unix 3 [ ] SEQPACKET CONNECTED 84090
unix 3 [ ] SEQPACKET CONNECTED 60045
unix 2 [ ] DGRAM 24515
unix 2 [ ] DGRAM 1803
unix 3 [ ] STREAM CONNECTED 107805
unix 2 [ ] DGRAM 18371
unix 3 [ ] STREAM CONNECTED 225842 /dev/socket/dnsproxyd
unix 3 [ ] STREAM CONNECTED 55179
unix 2 [ ] DGRAM 34265
unix 2 [ ] DGRAM 127042
unix 3 [ ] STREAM CONNECTED 112909
unix 2 [ ] DGRAM 17909
unix 3 [ ] SEQPACKET CONNECTED 93169
unix 3 [ ] STREAM CONNECTED 67450 @Multiclient
unix 2 [ ] DGRAM 7712
unix 2 [ ] DGRAM 148971
unix 3 [ ] SEQPACKET CONNECTED 46208
unix 2 [ ] DGRAM 33840
unix 2 [ ] DGRAM 15540
unix 3 [ ] SEQPACKET CONNECTED 60044
unix 2 [ ] DGRAM 1823
unix 3 [ ] SEQPACKET CONNECTED 93170
unix 3 [ ] SEQPACKET CONNECTED 226404
unix 3 [ ] STREAM CONNECTED 70038
unix 2 [ ] DGRAM 58817
unix 3 [ ] STREAM CONNECTED 60735
unix 2 [ ] DGRAM 36193
unix 3 [ ] SEQPACKET CONNECTED 28115
unix 2 [ ] DGRAM 18225
unix 2 [ ] DGRAM 17662
unix 3 [ ] SEQPACKET CONNECTED 227561
unix 2 [ ] DGRAM 34200
unix 2 [ ] DGRAM 32333
unix 2 [ ] DGRAM 58933
unix 3 [ ] SEQPACKET CONNECTED 69069 /dev/socket/perfsdkserver
unix 3 [ ] SEQPACKET CONNECTED 67527
unix 2 [ ] DGRAM 1826
unix 2 [ ] DGRAM 49886
unix 3 [ ] SEQPACKET CONNECTED 33699
unix 2 [ ] DGRAM 34010
unix 3 [ ] SEQPACKET CONNECTED 25019
unix 3 [ ] STREAM CONNECTED 223962
unix 2 [ ] DGRAM 180050
unix 3 [ ] STREAM CONNECTED 112910
unix 2 [ ] DGRAM 35395
unix 2 [ ] DGRAM 34198
unix 3 [ ] STREAM CONNECTED 222807 /dev/socket/dnsproxyd
unix 2 [ ] DGRAM 115839
unix 3 [ ] SEQPACKET CONNECTED 226405
unix 2 [ ] DGRAM 34213
unix 3 [ ] STREAM CONNECTED 172846
unix 2 [ ] DGRAM 59207
unix 2 [ ] DGRAM 60981
unix 2 [ ] DGRAM 27692
unix 2 [ ] DGRAM 196576
unix 2 [ ] DGRAM 198469
unix 3 [ ] SEQPACKET CONNECTED 120421
unix 3 [ ] SEQPACKET CONNECTED 25018
unix 2 [ ] DGRAM 54791
unix 3 [ ] SEQPACKET CONNECTED 46246
unix 2 [ ] DGRAM 32860
unix 3 [ ] SEQPACKET CONNECTED 60946
unix 2 [ ] DGRAM 18364
unix 2 [ ] DGRAM 226575
unix 2 [ ] DGRAM 124793
unix 2 [ ] DGRAM 96675
unix 3 [ ] STREAM CONNECTED 42935
unix 2 [ ] DGRAM 17657
unix 3 [ ] SEQPACKET CONNECTED 60947
unix 3 [ ] SEQPACKET CONNECTED 69068
unix 3 [ ] SEQPACKET CONNECTED 60043
unix 2 [ ] DGRAM 16335
unix 3 [ ] SEQPACKET CONNECTED 36311
unix 2 [ ] DGRAM 27677
unix 2 [ ] DGRAM 214960
unix 3 [ ] STREAM CONNECTED 223963 /dev/socket/dnsproxyd
unix 3 [ ] SEQPACKET CONNECTED 227565
unix 2 [ ] DGRAM 158222
unix 3 [ ] SEQPACKET CONNECTED 46247
unix 3 [ ] SEQPACKET CONNECTED 41345
unix 3 [ ] SEQPACKET CONNECTED 226402
unix 2 [ ] DGRAM 208377
unix 2 [ ] DGRAM 59989
unix 2 [ ] DGRAM 33884
unix 3 [ ] SEQPACKET CONNECTED 25021
unix 2 [ ] DGRAM 99272
unix 2 [ ] DGRAM 31217
unix 3 [ ] SEQPACKET CONNECTED 194911 /dev/socket/logdr
unix 3 [ ] SEQPACKET CONNECTED 120420
unix 3 [ ] STREAM CONNECTED 42942
unix 2 [ ] DGRAM 127020
unix 2 [ ] DGRAM 34231
unix 3 [ ] SEQPACKET CONNECTED 216827
unix 2 [ ] DGRAM 193009
unix 3 [ ] SEQPACKET CONNECTED 54021
unix 3 [ ] SEQPACKET CONNECTED 36310
unix 2 [ ] DGRAM 18345
unix 2 [ ] DGRAM 59369
unix 2 [ ] DGRAM 208216
unix 3 [ ] SEQPACKET CONNECTED 113352
unix 2 [ ] DGRAM 49694
unix 2 [ ] DGRAM 212617
unix 3 [ ] SEQPACKET CONNECTED 25020
unix 3 [ ] STREAM CONNECTED 227582 /dev/socket/dnsproxyd
unix 3 [ ] SEQPACKET CONNECTED 84091
unix 3 [ ] STREAM CONNECTED 37864
unix 2 [ ] DGRAM 16057
unix 3 [ ] SEQPACKET CONNECTED 226407
unix 3 [ ] SEQPACKET CONNECTED 113350
unix 3 [ ] SEQPACKET CONNECTED 67528
unix 2 [ ] DGRAM 51487
unix 2 [ ] DGRAM 33090
unix 2 [ ] DGRAM 28542
unix 2 [ ] DGRAM 25369
unix 3 [ ] STREAM CONNECTED 227613 /dev/socket/dnsproxyd
unix 2 [ ] DGRAM 82398
unix 2 [ ] DGRAM 47227
unix 3 [ ] SEQPACKET CONNECTED 39985
unix 3 [ ] SEQPACKET CONNECTED 40974
unix 2 [ ] DGRAM 192722
unix 2 [ ] STREAM 59929
unix 2 [ ] DGRAM 225027
unix 3 [ ] SEQPACKET CONNECTED 45626
unix 3 [ ] SEQPACKET CONNECTED 84093
unix 2 [ ] DGRAM 70678
unix 3 [ ] SEQPACKET CONNECTED 46248
unix 3 [ ] SEQPACKET CONNECTED 28108
unix 3 [ ] SEQPACKET CONNECTED 46249
unix 2 [ ] DGRAM 3038
unix 3 [ ] STREAM CONNECTED 33093
unix 2 [ ] DGRAM 16330
unix 2 [ ] DGRAM 7518
unix 3 [ ] STREAM CONNECTED 227584 /dev/socket/dnsproxyd
unix 2 [ ] DGRAM 192881
unix 3 [ ] SEQPACKET CONNECTED 39986
unix 3 [ ] SEQPACKET CONNECTED 40973
unix 3 [ ] STREAM CONNECTED 37861
unix 3 [ ] STREAM CONNECTED 73925
unix 3 [ ] STREAM CONNECTED 215240
unix 2 [ ] DGRAM 197919
unix 3 [ ] SEQPACKET CONNECTED 45625
unix 3 [ ] SEQPACKET CONNECTED 28114
unix 2 [ ] DGRAM 216168
unix 2 [ ] DGRAM 138820
unix 3 [ ] SEQPACKET CONNECTED 57990
unix 3 [ ] STREAM CONNECTED 31212
unix 2 [ ] DGRAM 202955
unix 2 [ ] DGRAM 34409
unix 3 [ ] SEQPACKET CONNECTED 216826
unix 3 [ ] SEQPACKET CONNECTED 227562
unix 2 [ ] DGRAM 226335
unix 2 [ ] DGRAM 156848
unix 3 [ ] SEQPACKET CONNECTED 40976
unix 2 [ ] DGRAM 34425
unix 3 [ ] SEQPACKET CONNECTED 49810
unix 2 [ ] DGRAM 56745
unix 3 [ ] STREAM CONNECTED 33094
unix 3 [ ] SEQPACKET CONNECTED 57991
unix 3 [ ] STREAM CONNECTED 31214 /dev/socket/location/mq/location-mq-s
unix 3 [ ] SEQPACKET CONNECTED 67752
unix 2 [ ] DGRAM 16326
unix 2 [ ] DGRAM 117996
unix 3 [ ] SEQPACKET CONNECTED 95693
unix 3 [ ] SEQPACKET CONNECTED 95692
unix 2 [ ] DGRAM 34429
unix 2 [ ] DGRAM 131885
unix 2 [ ] DGRAM 94187
unix 3 [ ] STREAM CONNECTED 49488 /dev/socket/eris
unix 2 [ ] DGRAM 228416
unix 3 [ ] SEQPACKET CONNECTED 227571
unix 2 [ ] DGRAM 82074
unix 3 [ ] SEQPACKET CONNECTED 40975
unix 2 [ ] DGRAM 111460
unix 3 [ ] SEQPACKET CONNECTED 56768
unix 2 [ ] DGRAM 46390
unix 2 [ ] DGRAM 33187
unix 2 [ ] DGRAM 15692
unix 3 [ ] SEQPACKET CONNECTED 194910
unix 3 [ ] STREAM CONNECTED 107800
unix 2 [ ] DGRAM 31213
unix 2 [ ] DGRAM 25384
unix 2 [ ] DGRAM 183150
unix 2 [ ] DGRAM 123554
unix 3 [ ] SEQPACKET CONNECTED 33703
unix 2 [ ] DGRAM 194127
unix 2 [ ] DGRAM 104213
unix 3 [ ] SEQPACKET CONNECTED 67753
unix 2 [ ] DGRAM 28007
unix 2 [ ] DGRAM 86105
unix 2 [ ] DGRAM 44670
unix 2 [ ] DGRAM 192063
unix 2 [ ] DGRAM 119093
unix 2 [ ] DGRAM 44648
unix 3 [ ] STREAM CONNECTED 211964
unix 3 [ ] SEQPACKET CONNECTED 84089
unix 2 [ ] DGRAM 24462
unix 2 [ ] DGRAM 33026
unix 2 [ ] DGRAM 27706
unix 2 [ ] DGRAM 108480
unix 3 [ ] STREAM CONNECTED 214621
unix 3 [ ] SEQPACKET CONNECTED 78530
unix 2 [ ] DGRAM 49979
unix 2 [ ] DGRAM 39773
unix 2 [ ] DGRAM 33793
unix 3 [ ] STREAM CONNECTED 172847
unix 3 [ ] STREAM CONNECTED 60734
unix 2 [ ] DGRAM 25489
unix 3 [ ] STREAM CONNECTED 223914
unix 3 [ ] STREAM CONNECTED 227581
unix 3 [ ] SEQPACKET CONNECTED 39981
unix 2 [ ] DGRAM 15667
unix 3 [ ] STREAM CONNECTED 73926
unix 2 [ ] DGRAM 61067
unix 2 [ ] DGRAM 18416
unix 3 [ ] SEQPACKET CONNECTED 227559
unix 2 [ ] DGRAM 58066
unix 2 [ ] DGRAM 32231
unix 3 [ ] STREAM CONNECTED 107806
unix 2 [ ] DGRAM 69863
unix 2 [ ] DGRAM 60049
unix 3 [ ] STREAM CONNECTED 24498
unix 2 [ ] DGRAM 50135
unix 3 [ ] SEQPACKET CONNECTED 33698
unix 2 [ ] DGRAM 15646
unix 3 [ ] STREAM CONNECTED 222806
unix 2 [ ] DGRAM 7651
unix 3 [ ] SEQPACKET CONNECTED 227570
unix 3 [ ] SEQPACKET CONNECTED 113349
unix 3 [ ] SEQPACKET CONNECTED 39982
unix 3 [ ] STREAM CONNECTED 39306 /data/.socket_stream
unix 3 [ ] SEQPACKET CONNECTED 49203
unix 3 [ ] STREAM CONNECTED 41363 /data/.socket_stream
unix 2 [ ] DGRAM 31083
unix 2 [ ] DGRAM 7514
unix 2 [ ] DGRAM 195272
unix 2 [ ] DGRAM 36510
unix 3 [ ] SEQPACKET CONNECTED 226403
unix 2 [ ] DGRAM 72864
unix 2 [ ] DGRAM 34348
unix 3 [ ] STREAM CONNECTED 211965
unix 3 [ ] STREAM CONNECTED 215241
unix 2 [ ] DGRAM 195970
unix 2 [ ] DGRAM 218128
unix 3 [ ] STREAM CONNECTED 227612
unix 3 [ ] STREAM CONNECTED 223915 /dev/socket/dnsproxyd
unix 2 [ ] DGRAM 216130
unix 3 [ ] SEQPACKET CONNECTED 41346
unix 3 [ ] SEQPACKET CONNECTED 39983
unix 2 [ ] DGRAM 27759
unix 2 [ ] DGRAM 93016
unix 3 [ ] SEQPACKET CONNECTED 49204
unix 2 [ ] DGRAM 46323
unix 3 [ ] SEQPACKET CONNECTED 33700
unix 3 [ ] STREAM CONNECTED 37865 @Multiclient
unix 2 [ ] DGRAM 31084
unix 3 [ ] STREAM CONNECTED 35769 /data/.socket_stream
unix 2 [ ] DGRAM 214188
unix 2 [ ] DGRAM 47338
unix 3 [ ] SEQPACKET CONNECTED 24505
unix 2 [ ] DGRAM 32901
unix 2 [ ] DGRAM 198396
unix 2 [ ] DGRAM 95750
unix 3 [ ] SEQPACKET CONNECTED 84094
unix 2 [ ] DGRAM 27731
unix 3 [ ] STREAM CONNECTED 225841
unix 3 [ ] SEQPACKET CONNECTED 226406
unix 2 [ ] DGRAM 158247
unix 2 [ ] DGRAM 95638
unix 3 [ ] SEQPACKET CONNECTED 39984
unix 3 [ ] STREAM CONNECTED 35781
unix 2 [ ] DGRAM 88050
unix 3 [ ] SEQPACKET CONNECTED 49809
unix 3 [ ] SEQPACKET CONNECTED 24506
unix 2 [ ] DGRAM 46346
unix 3 [ ] SEQPACKET CONNECTED 33701
unix 2 [ ] DGRAM 32998
unix 2 [ ] DGRAM 77794
unix 2 [ ] DGRAM 23750
unix 2 [ ] DGRAM 2299
unix 2 [ ] DGRAM 193032
unix 3 [ ] STREAM CONNECTED 78734
unix 3 [ ] SEQPACKET CONNECTED 83012
unix 3 [ ] STREAM CONNECTED 36065 /dev/socket/location/mq/location-mq-s
unix 2 [ ] DGRAM 27319
unix 2 [ ] DGRAM 25856
unix 3 [ ] SEQPACKET CONNECTED 45229
unix 3 [ ] SEQPACKET CONNECTED 32649 /dev/socket/lmkd
unix 2 [ ] DGRAM 27480
unix 2 [ ] DGRAM 26086
unix 2 [ ] DGRAM 185029
unix 3 [ ] SEQPACKET CONNECTED 78733
unix 2 [ ] DGRAM 39207
unix 2 [ ] DGRAM 2260
unix 2 [ ] DGRAM 43666
unix 3 [ ] STREAM CONNECTED 39259 /dev/socket/zygote
unix 3 [ ] STREAM CONNECTED 182584
unix 2 [ ] DGRAM 2159
unix 2 [ ] DGRAM 27440
unix 2 [ ] DGRAM 25894
unix 2 [ ] DGRAM 2305
unix 2 [ ] DGRAM 48575
unix 2 [ ] DGRAM 226784
unix 2 [ ] DGRAM 31786
unix 2 [ ] DGRAM 27285
unix 2 [ ] DGRAM 35049
unix 2 [ ] DGRAM 94869
unix 3 [ ] STREAM CONNECTED 8112
unix 3 [ ] STREAM CONNECTED 78735
unix 3 [ ] SEQPACKET CONNECTED 83013
unix 2 [ ] DGRAM 2302
unix 2 [ ] DGRAM 23677
unix 3 [ ] STREAM CONNECTED 78737
unix 3 [ ] STREAM CONNECTED 43799
unix 2 [ ] DGRAM 23634
unix 2 [ ] DGRAM 27364
unix 3 [ ] SEQPACKET CONNECTED 45197
unix 2 [ ] DGRAM 117824
unix 2 [ ] DGRAM 27526
unix 2 [ ] DGRAM 25804
unix 3 [ ] SEQPACKET CONNECTED 45228
unix 3 [ ] SEQPACKET CONNECTED 45198
unix 3 [ ] SEQPACKET CONNECTED 39700
unix 3 [ ] SEQPACKET CONNECTED 39941
unix 2 [ ] DGRAM 23909
unix 3 [ ] STREAM CONNECTED 43800
unix 3 [ ] SEQPACKET CONNECTED 78746
unix 3 [ ] STREAM CONNECTED 8100
unix 3 [ ] STREAM CONNECTED 7713
unix 2 [ ] DGRAM 214315
unix 2 [ ] DGRAM 27402
unix 2 [ ] DGRAM 25821
unix 3 [ ] SEQPACKET CONNECTED 78747
unix 3 [ ] STREAM CONNECTED 37881
unix 3 [ ] STREAM CONNECTED 43843
unix 3 [ ] STREAM CONNECTED 28227 /dev/socket/traced_producer
unix 2 [ ] DGRAM 213780
unix 3 [ ] SEQPACKET CONNECTED 78732
unix 2 [ ] DGRAM 27509
unix 2 [ ] DGRAM 112196
unix 3 [ ] SEQPACKET CONNECTED 39940
unix 3 [ ] SEQPACKET CONNECTED 35179
unix 3 [ ] SEQPACKET CONNECTED 105139
unix 3 [ ] STREAM CONNECTED 36124 @com.android.internal.os.WebViewZygoteInit/8008e13c-f194-4023-98cf-138090c059a4
unix 2 [ ] DGRAM 27624
unix 2 [ ] DGRAM 25759
unix 2 [ ] DGRAM 214560
unix 3 [ ] STREAM CONNECTED 107303
unix 2 [ ] DGRAM 26447
unix 2 [ ] DGRAM 27449
unix 2 [ ] DGRAM 35089
unix 3 [ ] STREAM CONNECTED 107302
unix 3 [ ] STREAM CONNECTED 78744
unix 3 [ ] SEQPACKET CONNECTED 39701
unix 3 [ ] STREAM CONNECTED 37882 /dev/socket/zygote_secondary
unix 2 [ ] DGRAM 23810
unix 2 [ ] DGRAM 193016
unix 2 [ ] DGRAM 26272
unix 2 [ ] DGRAM 185001
unix 3 [ ] SEQPACKET CONNECTED 78749
unix 3 [ ] SEQPACKET CONNECTED 95694
unix 2 [ ] DGRAM 7904
unix 3 [ ] SEQPACKET CONNECTED 48515
unix 2 [ ] DGRAM 45533
unix 2 [ ] DGRAM 26022
unix 3 [ ] SEQPACKET CONNECTED 45549
unix 2 [ ] DGRAM 2658
unix 2 [ ] DGRAM 213828
unix 2 [ ] DGRAM 7813
unix 2 [ ] DGRAM 30099
unix 3 [ ] SEQPACKET CONNECTED 226753
unix 2 [ ] DGRAM 30483
unix 3 [ ] SEQPACKET CONNECTED 45543
unix 3 [ ] SEQPACKET CONNECTED 93168
unix 3 [ ] STREAM CONNECTED 78743
unix 3 [ ] SEQPACKET CONNECTED 39703
unix 3 [ ] SEQPACKET CONNECTED 78748
unix 2 [ ] DGRAM 26127
unix 2 [ ] DGRAM 220521
unix 3 [ ] SEQPACKET CONNECTED 39702
unix 3 [ ] STREAM CONNECTED 78738
unix 2 [ ] DGRAM 95438
unix 3 [ ] SEQPACKET CONNECTED 45548
unix 3 [ ] SEQPACKET CONNECTED 48516
unix 3 [ ] SEQPACKET CONNECTED 56767
unix 3 [ ] STREAM CONNECTED 182583
unix 2 [ ] DGRAM 7925
unix 2 [ ] DGRAM 94570
unix 2 [ ] DGRAM 35130
unix 2 [ ] DGRAM 25933
unix 2 [ ] DGRAM 182940
unix 2 [ ] DGRAM 112372
unix 3 [ ] STREAM CONNECTED 39328 /dev/socket/domainfproxyd
unix 3 [ ] SEQPACKET CONNECTED 105140
unix 2 [ ] DGRAM 29763
unix 3 [ ] SEQPACKET CONNECTED 78531
unix 2 [ ] DGRAM 24198
unix 2 [ ] DGRAM 26135
unix 2 [ ] DGRAM 48301
unix 2 [ ] DGRAM 137871
unix 2 [ ] DGRAM 226778
unix 2 [ ] DGRAM 30526
unix 2 [ ] DGRAM 26060
unix 3 [ ] STREAM CONNECTED 8127
unix 2 [ ] DGRAM 24132
unix 2 [ ] DGRAM 48410
unix 3 [ ] SEQPACKET CONNECTED 226754
unix 2 [ ] DGRAM 137192
unix 3 [ ] SEQPACKET CONNECTED 32676
unix 2 [ ] DGRAM 48411
unix 3 [ ] SEQPACKET CONNECTED 32677
unix 2 [ ] DGRAM 7767
unix 3 [ ] SEQPACKET CONNECTED 45544
unix 2 [ ] DGRAM 43615
unix 2 [ ] DGRAM 30076

Which compared to my Linux PC there are A LOT more connections then I am used to seeing. Is this a normal or typical netstat return for Android OS? What are the typical ports used by the Android system? Are the "proxy" connections normal? (ex. /dev/socket/dnsproxyd ) I'm familiar with using proxies on PC but I wasn't aware I was using any on this phone. Any insight would be greatly . Thanks in advance.

System Update?

Hello, I got my new Pixel 4a two days ago. This is my first Android smartphone and I am still learning the way Android does things and unlearning the iOS way.

It is only by pure chance that while browsing the different settings, I got to > System > Advanced and there at the very bottom of the Advanced screen, it surprised me to see the last item is System Update > System Update available (Android 11)

Before getting deep down into the settings, I did not see any sign that a system update was available. Nothing visible on the System icon on my home screen to make me aware that something new is available for the system.

Did I miss something? I am still on Android 10 and before I update to 11; can somebody tell me where is and how looks the hint about an available update, so when a future update is available, I will be better aware.

Thank you very much.

Apps Cannot find symbol class class

I am finishing with the example Android application Real Estates on Mars. It was running well until

4) Task: Display a grid of images with RycyclerView

step 9. In MarsPropertyViewHolder, create a bind() method that takes a MarsProperty object as an argument and sets binding.property to that object. Call executePendingBindings() after setting the property, which causes the update to execute immediately.

see link here

I think I did it correctly:

class MarsPropertyViewHolder(private var binding:
GridViewItemBinding):
RecyclerView.ViewHolder(binding.root){
fun bind(marsProperty: MarsProperty) {
binding.property = marsProperty
binding.executePendingBindings()
}
}


I am getting one error while compiling the code:

cannot find symbol class class GridViewItemBindingImpl

Any advice on how to fix it?

Moving in

I bought a new phone: a Samsung Galaxy S10e. My old phone is only about 3 years old, I think, and running Android 6.0.1.
Shopping for, buying, and moving into a cell phone is a far more miserable experience than shopping for, buying, and moving into a new house.
So I opened up the box and what popped out? A little piece of paper suggesting that I use Smart Switch to make the move easy.
Cool, except that it does not work.

So can anyone suggest a way to move all of my apps, all of my app data, and all of my personal files (such as photos and other things I may have created on the phone) that will actually work?

I know this is probably a very common question, but consumers have been buying new computers since the early 1980s and I should think that someone would have figured out how to make it easier by now.

Thank you.

(New Game) MasterBlocks, The Brainmelter. Version 1.0.

MASTERBLOCKS (App) by Arganth Games
Hi, I'm Arganth. Here is my game:

MasterBlocks is a logic game whose objective is to bring the colored blocks to their marks, using the mechanics of its more than 30 types of blocks, and with more than 200 levels.

It is my first game for Android, and as a puzzle lover I wanted to summarize all my experience with this game. It is not graphically the best, because I basically have no studies of this, but it does what really matters. I offer a great challenge in which you not only have to complete the levels, also do them in the minimum of movements that I have put (or less) to unlock more challenging extra levels (optional).

All information within the game is in English and Spanish. Anyone who likes this type of games please give it a try and make it known. It gets better as new blocks emerge. Please, click on the links to see it.

Here solving a basic level:
Here solving an intermediate level:
And a trailer in Spanish (because I'm Spanish, but the game is in both languages):

Warnings: only works on 70% of Android devices, sorry. 99 cents, I'm unemployed :(, but you need more than 100 hours to complete 100%. Game still expanding. Thanks.

Filter

Back
Top Bottom