

Exhale01
Lurker
Ok, let me just post this in the event someone has some important files deleted that may cause some undesirable feelings. These instructions should be fairly simple using a program, (using a PC may make things easier.)
First things first, take your Android device and connect it to your Computer/Laptop (make sure the device is listed in Mass storage or MTP). Have Recuva downloaded and installed, and go ahead and open it up. (Recuva has a free or paid version, depending on how far you’re willing to go with file recovery.)
Before we begin any file recovery, this may or may not corrupt your system’s internal memory.
I recommend you to create a backup of your system or copy your system storage’s content and back them up somewhere in the case that something goes wrong.
Keep in mind the format of your device’s Internal Storage/External Micro SD card must be either FAT32 or NTFS. More information on File systems here. If for some reason your Internal storage or external Micro SD card isn’t being recognized by your operating system, you may have to go through a complete copy/paste of your storage’s contents, format the drive that isn’t being recognized to either NTFS or FAT32 (whichever works for you) and then dumping the copied contents back onto the storage. If this method doesn’t work for you, then skip to the next method, you may have better luck there.
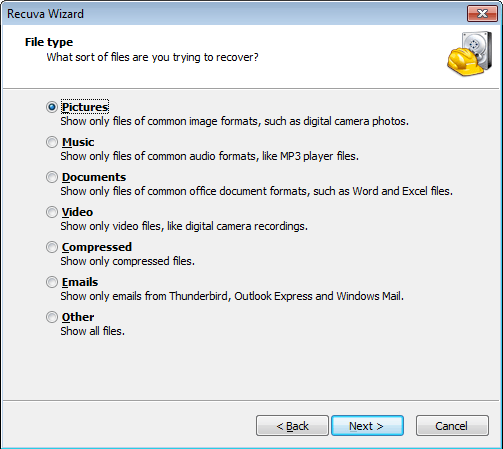
When you open the program, it will ask you which type of file you want to recover. Go ahead and select which one you want, or select “Other” if your file isn’t listed in the main options. Then let the system scan run and that’s pretty much it, follow on screen instructions and you’re ready to go.
Method #2. DiskDigger app for Android
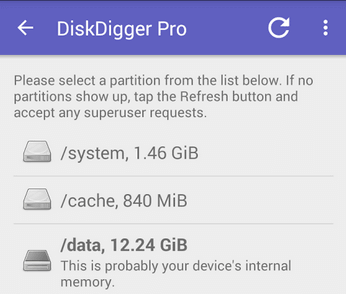
This method may be easier than traditional desktop file recovery methods. Go ahead and download “Diskdigger for Android” and open it up. Note that this app does require you to have Root access in order for the app to run. Go overhereto the Google Play Store to download Diskdigger, or manually search for it. There are other diskdigging/undeleting applications on the Google Play Store, but i find Diskdigger the easiest to use when it comes to Android file recovery.
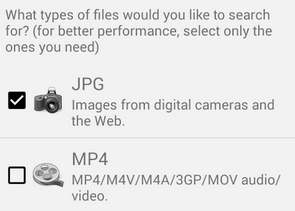
Go ahead and select which section of the storage you want to scan for deleted files. Again, like Recuva, choose the type of file you want recovered, (This will make the scan significantly faster, since it only detects the chosen file type and ignores all others), and let it scan. The bigger the capacity/taken space of the selected drive, the longer the scan may take, so be patient.
Once the scan is completed, you can view all of the deleted files found, and choose to view them, restore them, or manually relocate them. It’s as simple as that. No more stressing over your word document that took you 7 hours to complete, or the rare baby pictures that you had only 1 copy of. Just follow such simple steps to recovering your deleted files, and go about your day.
First things first, take your Android device and connect it to your Computer/Laptop (make sure the device is listed in Mass storage or MTP). Have Recuva downloaded and installed, and go ahead and open it up. (Recuva has a free or paid version, depending on how far you’re willing to go with file recovery.)
Before we begin any file recovery, this may or may not corrupt your system’s internal memory.
I recommend you to create a backup of your system or copy your system storage’s content and back them up somewhere in the case that something goes wrong.
Keep in mind the format of your device’s Internal Storage/External Micro SD card must be either FAT32 or NTFS. More information on File systems here. If for some reason your Internal storage or external Micro SD card isn’t being recognized by your operating system, you may have to go through a complete copy/paste of your storage’s contents, format the drive that isn’t being recognized to either NTFS or FAT32 (whichever works for you) and then dumping the copied contents back onto the storage. If this method doesn’t work for you, then skip to the next method, you may have better luck there.
When you open the program, it will ask you which type of file you want to recover. Go ahead and select which one you want, or select “Other” if your file isn’t listed in the main options. Then let the system scan run and that’s pretty much it, follow on screen instructions and you’re ready to go.
Method #2. DiskDigger app for Android
This method may be easier than traditional desktop file recovery methods. Go ahead and download “Diskdigger for Android” and open it up. Note that this app does require you to have Root access in order for the app to run. Go overhereto the Google Play Store to download Diskdigger, or manually search for it. There are other diskdigging/undeleting applications on the Google Play Store, but i find Diskdigger the easiest to use when it comes to Android file recovery.
Go ahead and select which section of the storage you want to scan for deleted files. Again, like Recuva, choose the type of file you want recovered, (This will make the scan significantly faster, since it only detects the chosen file type and ignores all others), and let it scan. The bigger the capacity/taken space of the selected drive, the longer the scan may take, so be patient.
Once the scan is completed, you can view all of the deleted files found, and choose to view them, restore them, or manually relocate them. It’s as simple as that. No more stressing over your word document that took you 7 hours to complete, or the rare baby pictures that you had only 1 copy of. Just follow such simple steps to recovering your deleted files, and go about your day.