Sam Voss
Android Enthusiast
Want to have a more organized area to develop? faster responses to questions? more android developers? well check out forums.xynteq.com, thats exactly what we're trying to do, so bear with us, and go ahead and ask questions, more than likely one of us will be able to answer it for you ")

Tutorial Description: How many questions about how to install and application from developing in Eclipse to your phone for testing do we see in a day? Plenty. It's not a dumb question, we've all been there, so here is a step by step guide, including pictures, on how do do exactly this.
Difficulty: 0/5 If you can read/follow directions, this will be a breeze for you")

Overview:
Point 1: Declare your application as "debuggable"
Overview: This is telling Android that the app is debuggable, although I have in the past just skipped this step, and seem's to work just fine for me.
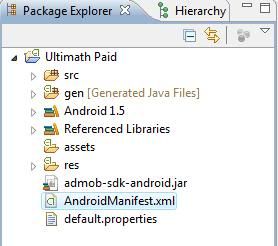
I. Open file "AndroidManifest.xml" in eclipse by double clicking on it
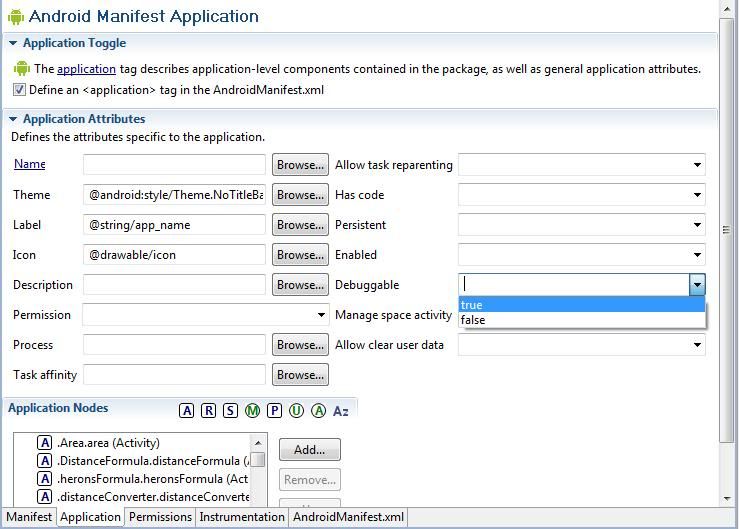
II. Declare it!
Way 1: Change to the "Application" tab, then click the down arrow next to
"Debuggable" and click true
Way 2: add the following code to your manifest in the AndroidManifest.xml tab
Add:
In the:
before the > tag.
Point 2: turn on USB Debugging!
On your phone, go to home screen>menu>settings>application settings
Here do two things:
USB debugging
Point 3: Setting up your computer
Windows:
You need to download and install a USB Driver, and explanation and download are in the same place, so really no need to go into great detail here! (click here to go to site)
Mac OS X:
It just works! Yep thats right, don't need to worry about that one! (yes, apple gets their one and only +1)
Ubuntu Linux:
(excerpt from here)
Vendor ID Table
Point 4: Running Application on Phone via Eclipse
I. Plug phone into computer
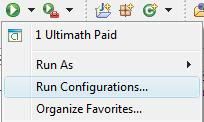
II. Open Run Configurations
III. Click on "Target" then change to "Manual"
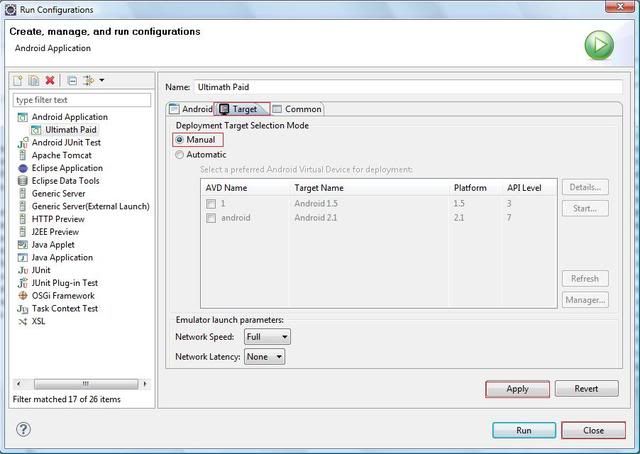
Apply & Save
IV. Run your application!
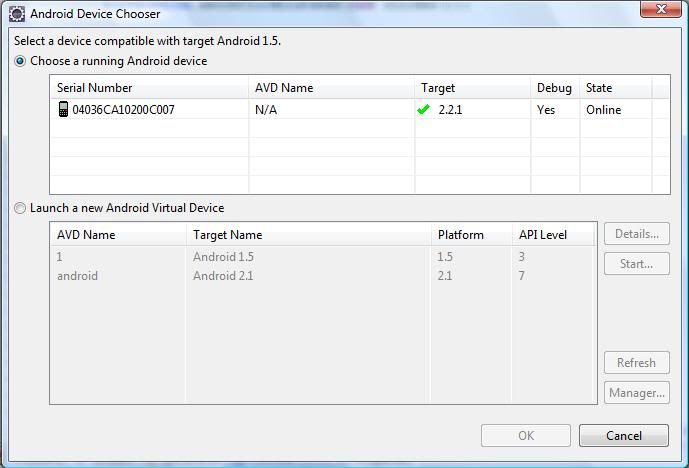
You will see this dialog, click your phone then OK and it'll install on your phone!
Voil
Tutorial Description: How many questions about how to install and application from developing in Eclipse to your phone for testing do we see in a day? Plenty. It's not a dumb question, we've all been there, so here is a step by step guide, including pictures, on how do do exactly this.
Difficulty: 0/5 If you can read/follow directions, this will be a breeze for you
Overview:
- Declare your application as "debuggable" in your Android Manifest.
- Turn on USB Debugging
- Setup your system to detect your device.
- Running Application on Phone via Eclipse
Point 1: Declare your application as "debuggable"
Overview: This is telling Android that the app is debuggable, although I have in the past just skipped this step, and seem's to work just fine for me.
I. Open file "AndroidManifest.xml" in eclipse by double clicking on it
Code:
Note: I have seen instances when opening it opens only the generic .xml editor, I'm not sure how to permanently fix this, but right click>open with>Android Manifest EditorII. Declare it!
Way 1: Change to the "Application" tab, then click the down arrow next to
"Debuggable" and click true
Way 2: add the following code to your manifest in the AndroidManifest.xml tab
Add:
Code:
android:debuggable="true"
Code:
<application android:icon="@drawable/icon" android:label="@string/app_name">Point 2: turn on USB Debugging!
On your phone, go to home screen>menu>settings>application settings
Here do two things:
- Check Unknown sources
- Go to Development
USB debugging
Point 3: Setting up your computer
Windows:
You need to download and install a USB Driver, and explanation and download are in the same place, so really no need to go into great detail here! (click here to go to site)
Mac OS X:
It just works! Yep thats right, don't need to worry about that one! (yes, apple gets their one and only +1
)Ubuntu Linux:
(excerpt from here)
Code:
If you're developing on Ubuntu Linux, you need to add a rules file that contains a USB configuration for each type of device you want to use for development. Each device manufacturer uses a different vendor ID. The example rules files below show how to add an entry for a single vendor ID (the HTC vendor ID). In order to support more devices, you will need additional lines of the same format that provide a different value for the SYSFS{idVendor} property. For other IDs, see the table of USB Vendor IDs, below.
Log in as root and create this file: /etc/udev/rules.d/51-android.rules.
For Gusty/Hardy, edit the file to read:
SUBSYSTEM=="usb", SYSFS{idVendor}=="0bb4", MODE="0666"
For Dapper, edit the file to read:
SUBSYSTEM=="usb_device", SYSFS{idVendor}=="0bb4", MODE="0666"
Now execute:
chmod a+r /etc/udev/rules.d/51-android.rules
Vendor ID Table
Code:
Manufacturer	USB Vendor ID
Acer	        0502
Dell	        413c
Foxconn	        0489
Garmin-Asus	091E
HTC	        0bb4
Huawei	        12d1
Kyocera	        0482
LG	        1004
Motorola	22b8
Nvidia          0955
Pantech	        10A9
Samsung      	04e8
Sharp	        04dd
Sony Ericsson	0fce
ZTE	        19D2
Point 4: Running Application on Phone via Eclipse
I. Plug phone into computer
II. Open Run Configurations
III. Click on "Target" then change to "Manual"
Apply & Save
IV. Run your application!
You will see this dialog, click your phone then OK and it'll install on your phone!
Voil