
okay first i want to start out at i looked at forums and there were no real pictures as to the differences between the narrow and wide LCD of the evo 4g and while i had the chance i took two phones apart and took some pictures that might help.
I followed the video on how to disassemble the digitizer but it didnt go into detail about the lcd screen and other things so i just want to go into a little more detail
https://www.youtube.com/watch?v=jFmt6aLEWag
^video i watched
okay so ill start from the beginning
First you want to remove the battery and SD card as anyone else would say
then there are 6 screws (t5/t6) that need to be taken out
(edited for your visibility)

once thos screws are out put them in a safe place theyre very small and hard to keep track of
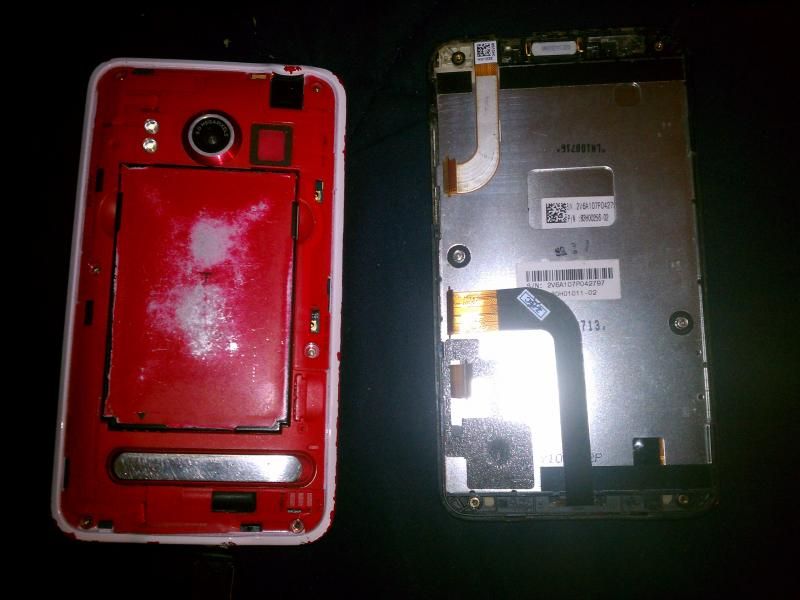
the phone will still be in tact by a few plastic clips so you want to run a plastic safe pry tool along the middle of the phone with some pressure it will pop out very easily
(be careful for the power button and volume up/down button)
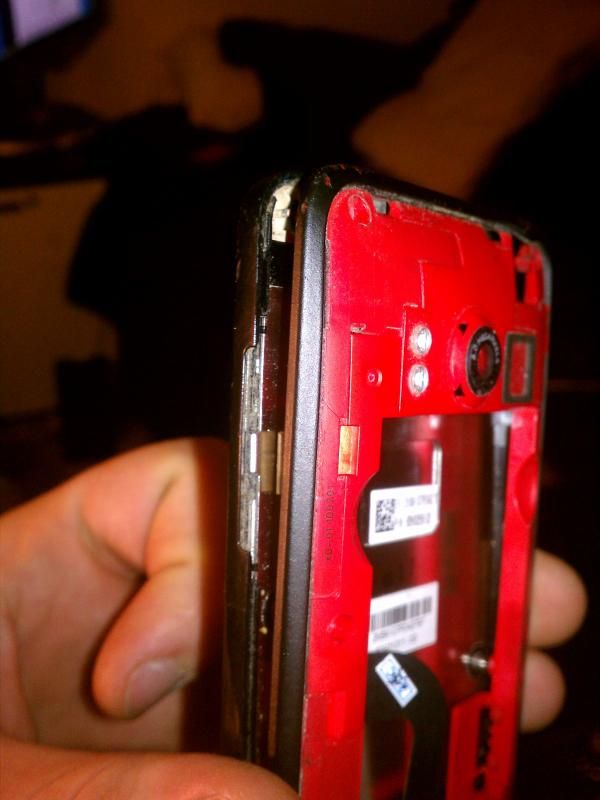
also pay attention to how the buttons fit there are small rubber flaps on the ends that help fit it into place without falling out

its hard to see but the power button tab sticks outwards as do the volume button so it can make contact with the terminals

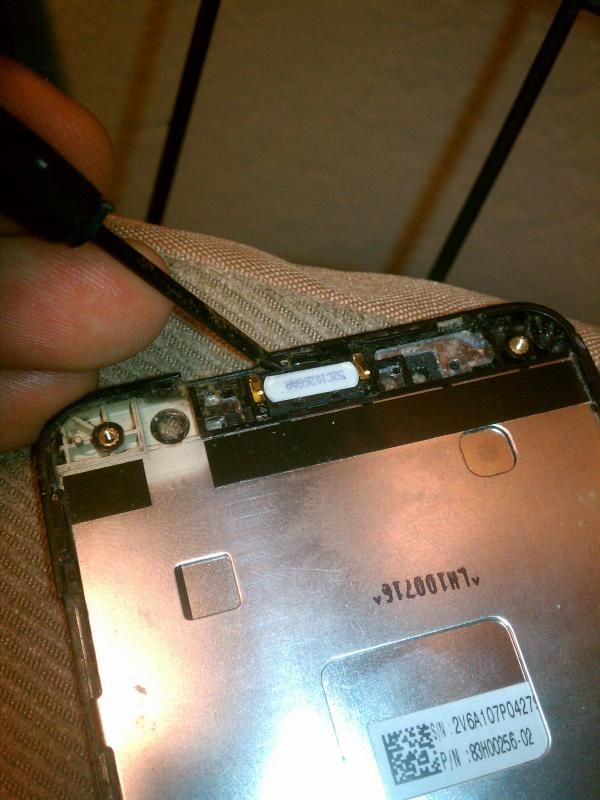
also to note there are 5 screws holding in the kickstand so it is easily replaceable and the dual LED flash is being held in by two screws (the small green board)
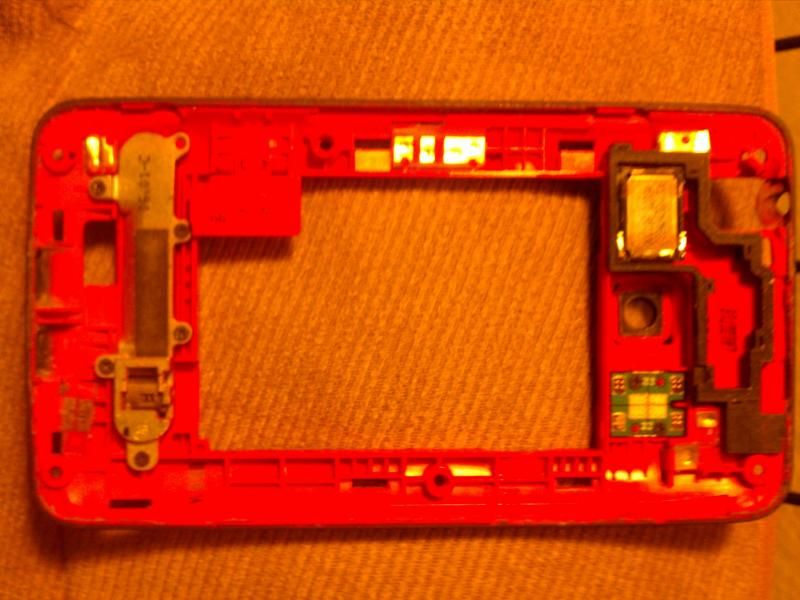
there is one phillips head screw holding in the main board. also the three connectors may have tape on them you have to remove
there are three connectors from top to bottom
it is the front camera
the middle is the digitizer
and the bottom is the LCD (depending on if you have a wide or narrow connector for the LCD (the main reason why im making this) the clips will be also the same pattern
clips the middle digitizer clip is toward the band the other two are away (note:you need to pop the clips UP)
also once you goto disconnect them there are tabs on the side you can use a plastic safe pry tool to take one side out at a time slowly as to not damage anything
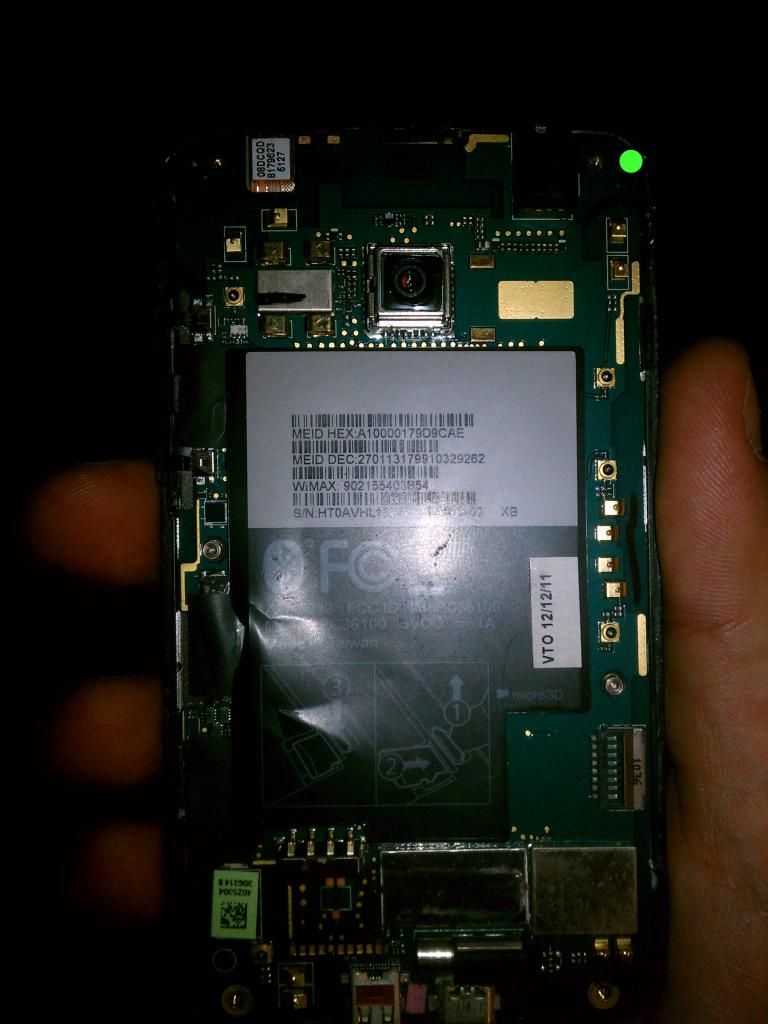
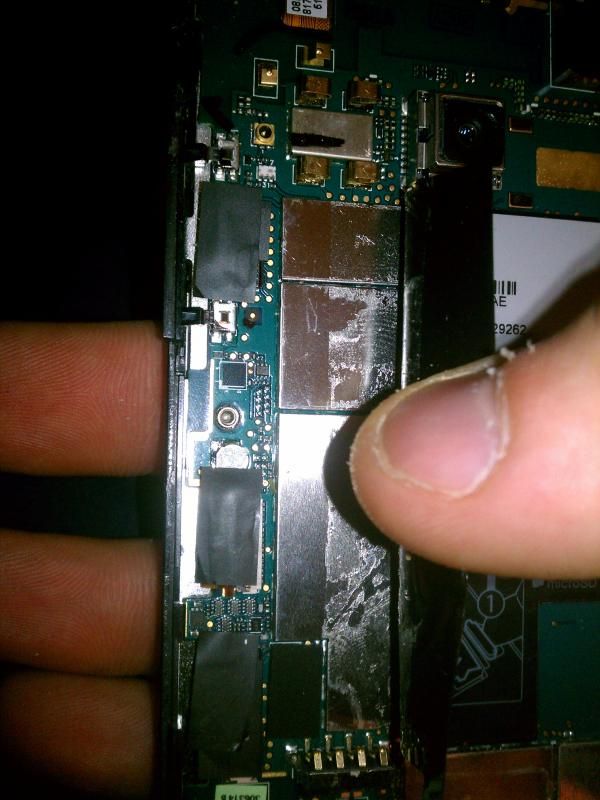
if you got the lcd and digitizer disconnected all you need to do is lift the main board and hold the camera band it should come right out no problem
you can pop off the camera with a pry tool
mine popped out with a problem
then your left with the front half of your phone (if you were to order the digitizer+lcd+front mid frame all in one this would be as far as you need to go)
i also need to add if you DO get that whole front half is WILL NOT come with the speaker so you will need to pop yours out its held in by some adhesive it should pop right out with a little pressure
(top left corner press down and pull it outwards)
now if you DO choose to go further (note: if you need both lcd and digi this would of been the easiest way its only 5 dollars more on ebay for the complete front half without the speaker) then lets continue
onto the digitizer (the last step of the video)
they say you can use a blowdryer to heat it up to make it softer that would be a nice idea to do it although you dont HAVE to
same idea you want to use the plastic safe pry tool start at the top where the speaker is and work your way around easily
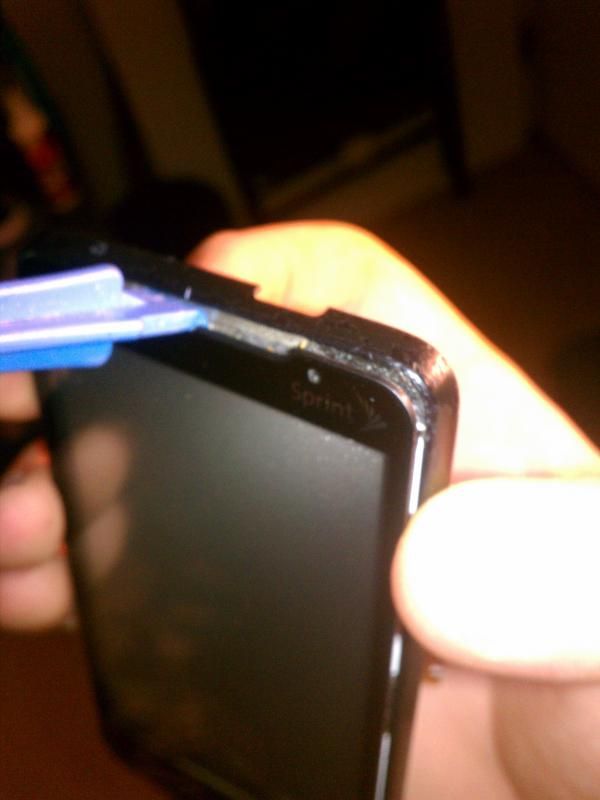
(note: be careful as the ribbon goes through the plastic housing at the bottom in the middle)
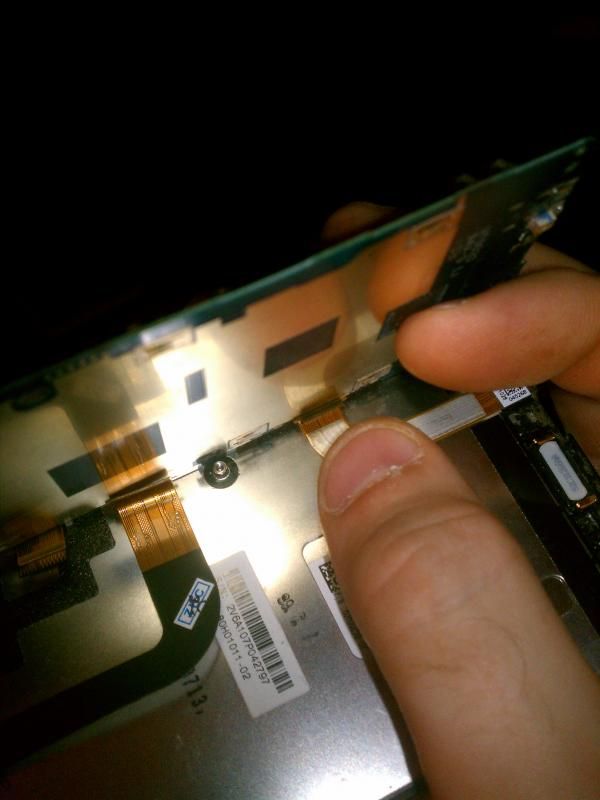
once that is off you will end up with this

now this is as far as the video covered which was very disappointing
so let me go into further detail (assuming your lcd is bad anyways you can use a small metal flathead as a pry tool) [the lcd is well at least mine was two sided tape on each side]
i started at the bottom where the ribbon was at and worked my way around till it popped out


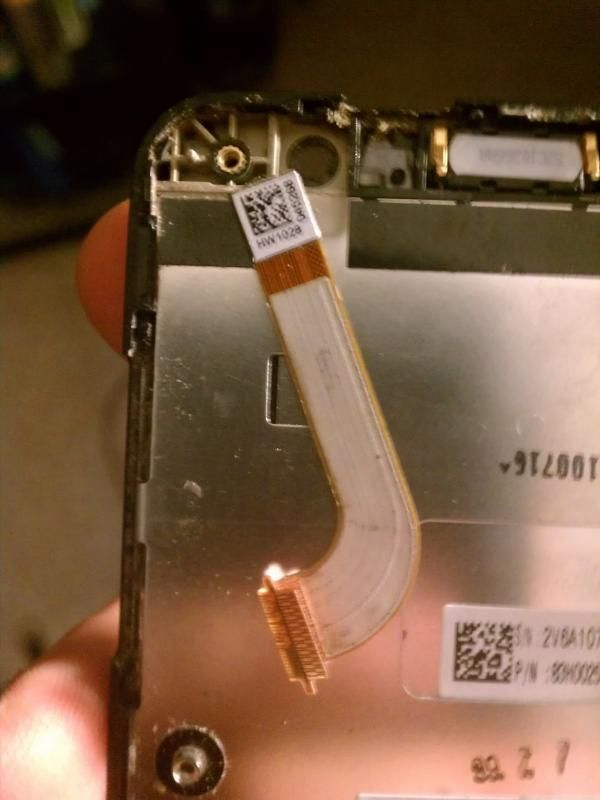
when you finally pop it out it will look like this
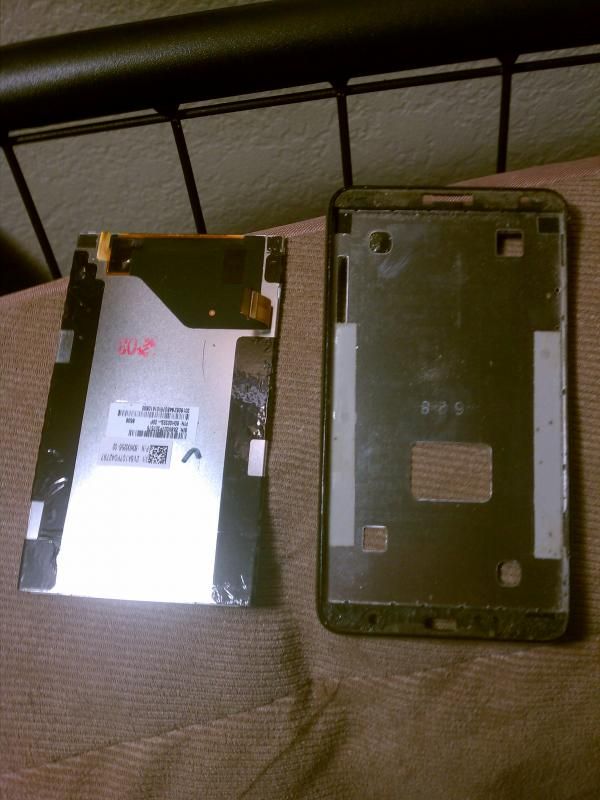
CONGRATULATIONS you have dismantled your evo 4g completely
tips for putting your phone back together (dont forgot the top right screw for the main board) be careful when putting the power and volume buttons back in as to not damage the rubber ends. you can always put the camera back on the mainboard first clip it down then do the lcd and digitizer
this phone was relatively simple to take apart so dont be afraid
now onto the point of why i originally was making this. there are two difference types of LCD screens for the evo as well as two different connector types there are NARROW and WIDE bands and they say you need to take apart the phone to really see (which is true in most cases until now)
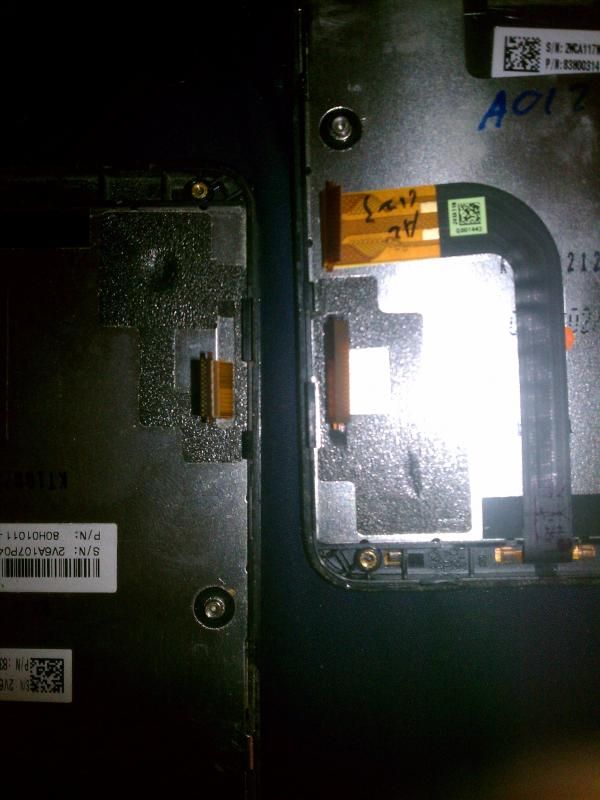
so i took some pictures for you to clearly see the differences between the two first ill show the LCD bands
(as you can see on the left is a narrow and the right is a wide)
and the board has a clear as day difference too
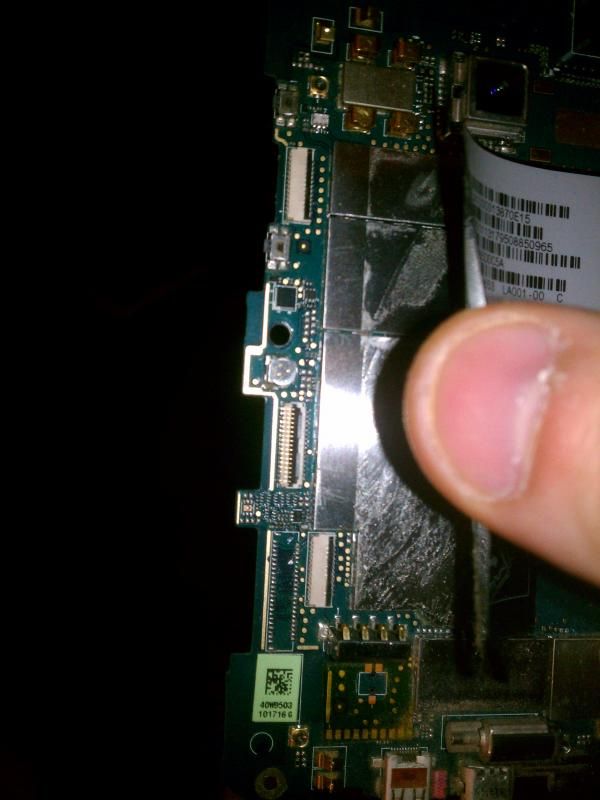
first i will show you the wide band (notice the length of it compared to the battery terminal)
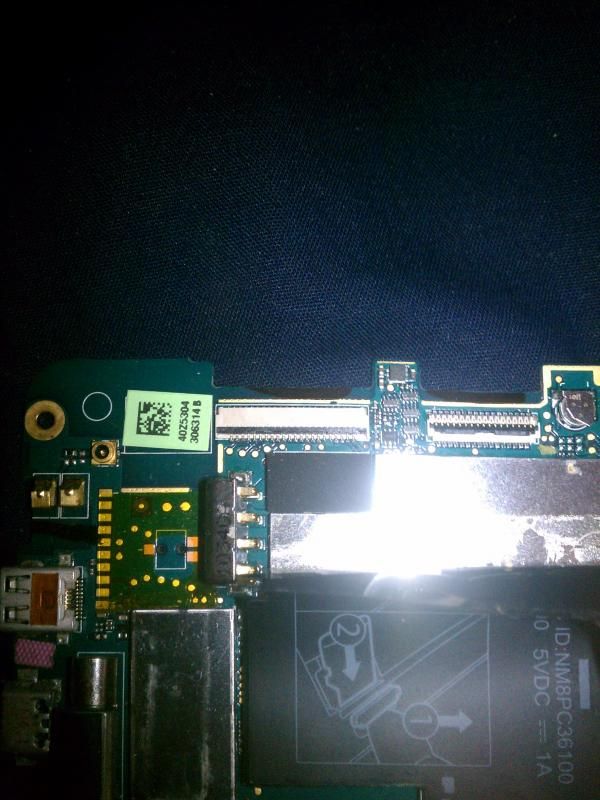
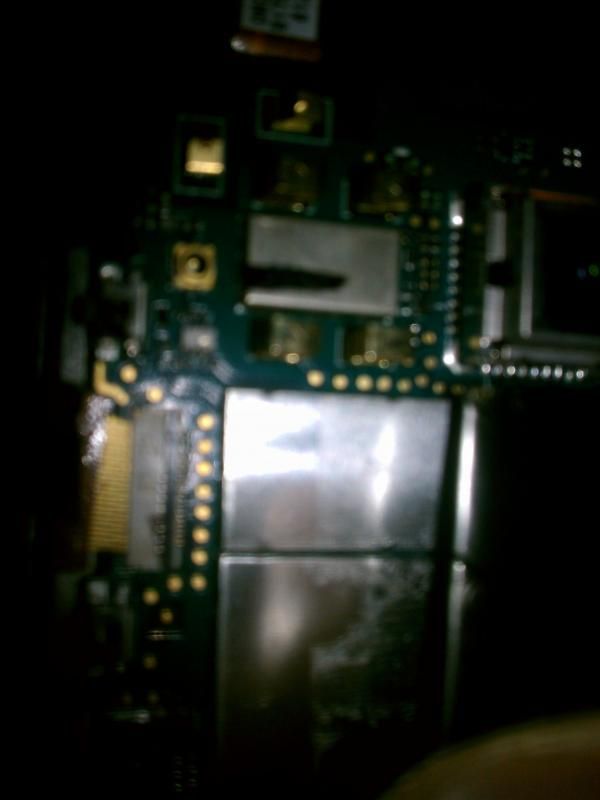
now look at the narrow band
(its in a different spot on the main board)

unlike what other have said on the forums BOTH connectors on the main board are white (neither are black)
so its clear that if you do take out your battery pay close attention to the location of the connector in relation to the location of the battery terminal
I HOPE THIS WILL HELP OUT ANYONE THAT IS WONDERING IF THEIR EVO IS A WIDE OR NARROW BAND WITHOUT OPENING UP THE PHONE
I followed the video on how to disassemble the digitizer but it didnt go into detail about the lcd screen and other things so i just want to go into a little more detail
https://www.youtube.com/watch?v=jFmt6aLEWag
^video i watched
okay so ill start from the beginning
First you want to remove the battery and SD card as anyone else would say
then there are 6 screws (t5/t6) that need to be taken out
(edited for your visibility)

once thos screws are out put them in a safe place theyre very small and hard to keep track of
the phone will still be in tact by a few plastic clips so you want to run a plastic safe pry tool along the middle of the phone with some pressure it will pop out very easily
(be careful for the power button and volume up/down button)

also pay attention to how the buttons fit there are small rubber flaps on the ends that help fit it into place without falling out

its hard to see but the power button tab sticks outwards as do the volume button so it can make contact with the terminals

also to note there are 5 screws holding in the kickstand so it is easily replaceable and the dual LED flash is being held in by two screws (the small green board)

there is one phillips head screw holding in the main board. also the three connectors may have tape on them you have to remove


there are three connectors from top to bottom
it is the front camera
the middle is the digitizer
and the bottom is the LCD (depending on if you have a wide or narrow connector for the LCD (the main reason why im making this) the clips will be also the same pattern
clips the middle digitizer clip is toward the band the other two are away (note:you need to pop the clips UP)

also once you goto disconnect them there are tabs on the side you can use a plastic safe pry tool to take one side out at a time slowly as to not damage anything

if you got the lcd and digitizer disconnected all you need to do is lift the main board and hold the camera band it should come right out no problem

you can pop off the camera with a pry tool
mine popped out with a problem

then your left with the front half of your phone (if you were to order the digitizer+lcd+front mid frame all in one this would be as far as you need to go)

i also need to add if you DO get that whole front half is WILL NOT come with the speaker so you will need to pop yours out its held in by some adhesive it should pop right out with a little pressure
(top left corner press down and pull it outwards)

now if you DO choose to go further (note: if you need both lcd and digi this would of been the easiest way its only 5 dollars more on ebay for the complete front half without the speaker) then lets continue
onto the digitizer (the last step of the video)
they say you can use a blowdryer to heat it up to make it softer that would be a nice idea to do it although you dont HAVE to
same idea you want to use the plastic safe pry tool start at the top where the speaker is and work your way around easily

(note: be careful as the ribbon goes through the plastic housing at the bottom in the middle)
once that is off you will end up with this

now this is as far as the video covered which was very disappointing
so let me go into further detail (assuming your lcd is bad anyways you can use a small metal flathead as a pry tool) [the lcd is well at least mine was two sided tape on each side]
i started at the bottom where the ribbon was at and worked my way around till it popped out


when you finally pop it out it will look like this

CONGRATULATIONS you have dismantled your evo 4g completely
tips for putting your phone back together (dont forgot the top right screw for the main board) be careful when putting the power and volume buttons back in as to not damage the rubber ends. you can always put the camera back on the mainboard first clip it down then do the lcd and digitizer
this phone was relatively simple to take apart so dont be afraid
now onto the point of why i originally was making this. there are two difference types of LCD screens for the evo as well as two different connector types there are NARROW and WIDE bands and they say you need to take apart the phone to really see (which is true in most cases until now)
so i took some pictures for you to clearly see the differences between the two first ill show the LCD bands
(as you can see on the left is a narrow and the right is a wide)

and the board has a clear as day difference too
first i will show you the wide band (notice the length of it compared to the battery terminal)

now look at the narrow band
(its in a different spot on the main board)

unlike what other have said on the forums BOTH connectors on the main board are white (neither are black)
so its clear that if you do take out your battery pay close attention to the location of the connector in relation to the location of the battery terminal
I HOPE THIS WILL HELP OUT ANYONE THAT IS WONDERING IF THEIR EVO IS A WIDE OR NARROW BAND WITHOUT OPENING UP THE PHONE

")


